2015/02/22

Guest post: Hiding cords

Today I have a very special post for you! It´s been written by a good friend of mine, Petra Erlandson. She is here today to share a unique way to hide ugly cords.


Hello JADE by Jenni readers!  I am so excited to be able to write this guest post.  I have never written a blog post before and very honored to have had my friend invite me to do it.


My name is Petra and I live in Southern California in the United States.  Wait… you might be asking yourself how do I know Jenni who lives in Finland?  The answer is because of Jackie Hernandez and the community she created called School of Decorating.  If you are not familiar with Jackie, please visit her blog Teal and Lime and the School of Decorating of which both Jenni and I are members.  It is amazing that we have struck a long distance friendship along with many other woman around the globe!


The project I want to share with you is the very easy and inexpensive way that I hide cords in our living room.  I think the issue of ugly black electrical cords is troublesome to many people.  Everything seems to have a cord and all of the cords are ugly!  Ugly cords are everywhere from the living room with TV, DVD, cable… to office’s with computer, printer, hard drive… perhaps even in the kitchen or bedroom with phone chargers, etc!


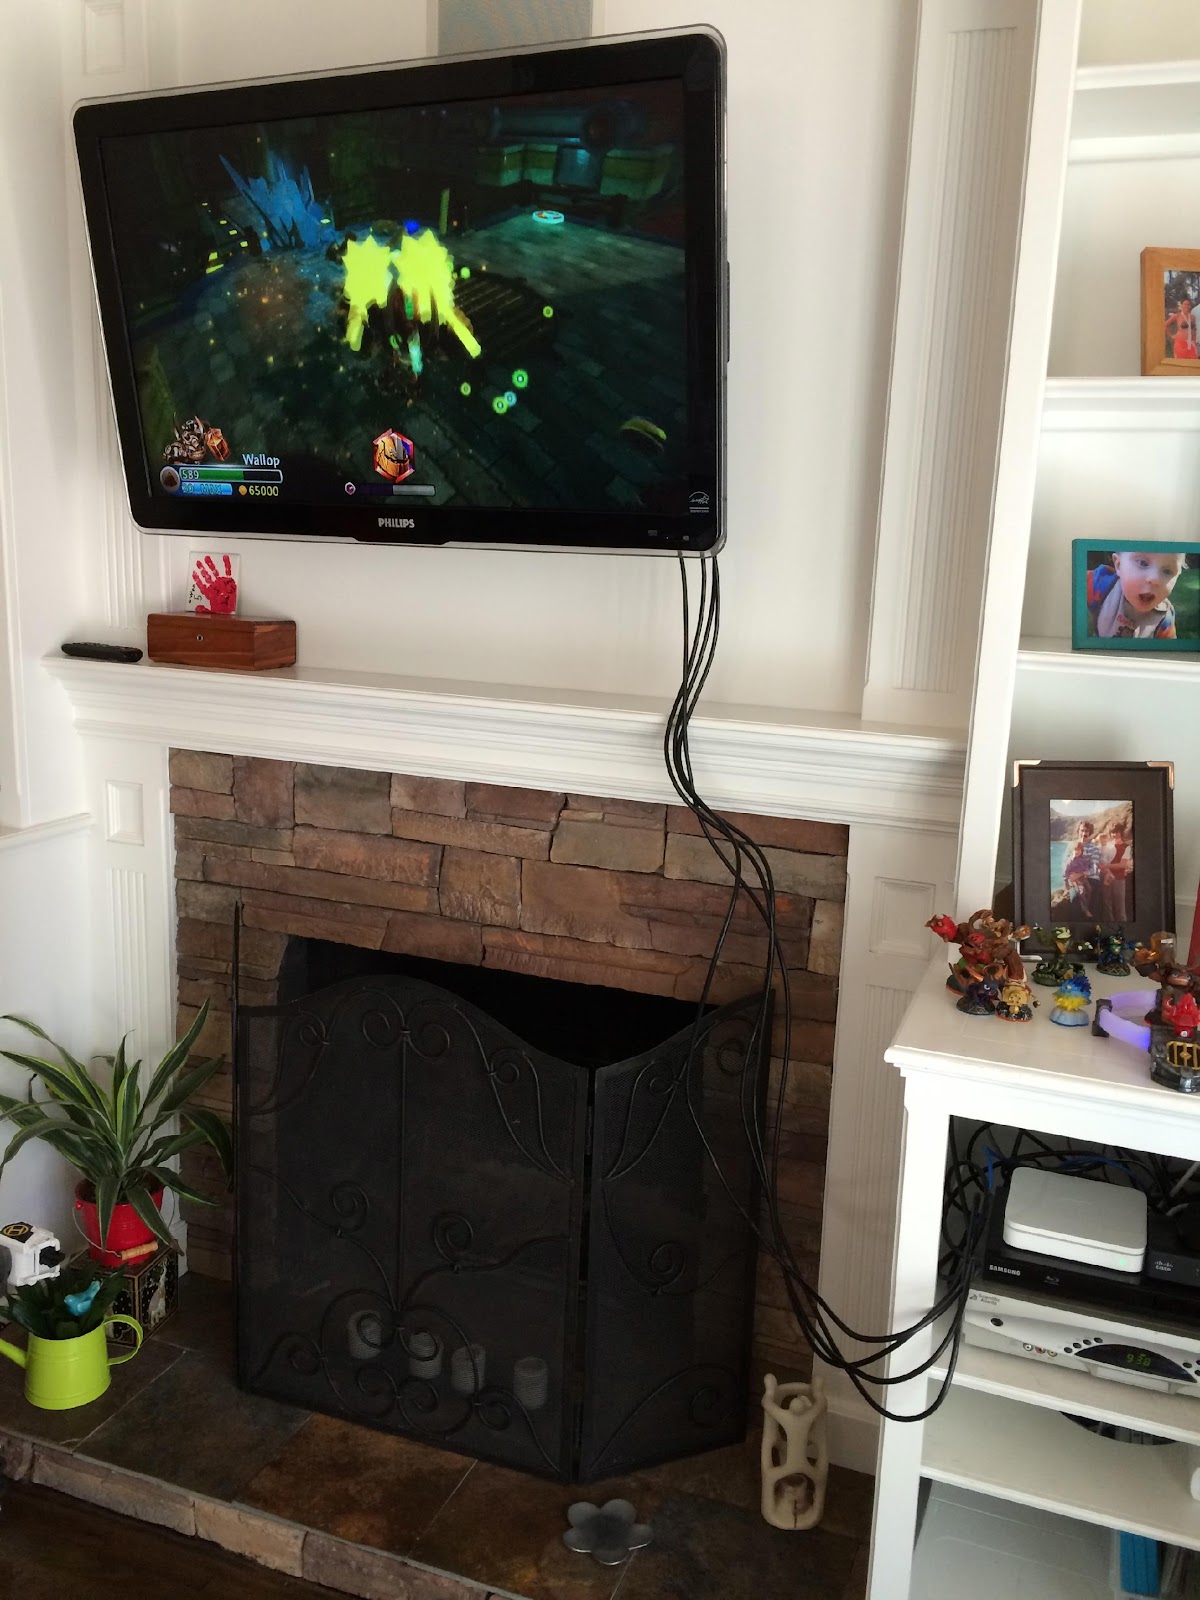
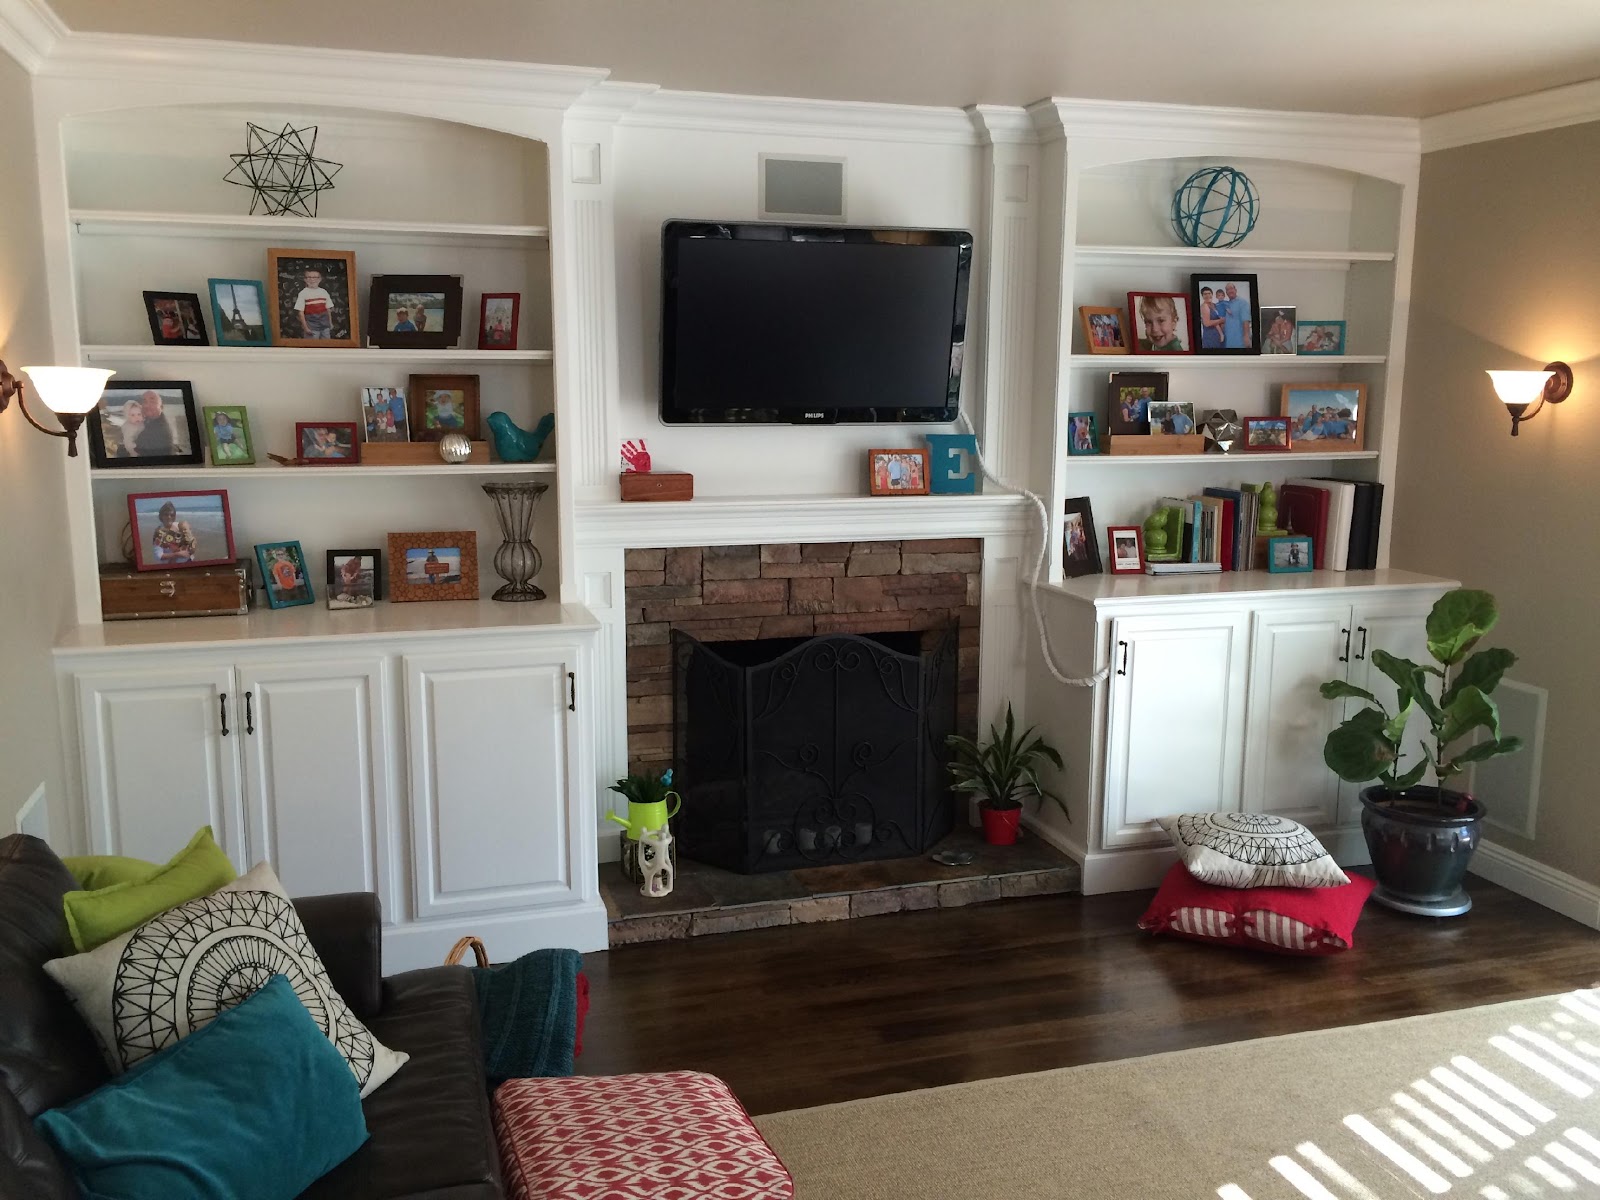
In our living room we have very nice built in shelving around the fireplace with our TV above and various components below in a cabinet to the right.  This shelving system was probably built and installed 15 years ago by a prior owner of our home.  At the time, they routed all of the cords carefully behind the cabinets and through to the back of the TV.  The problem is that all of those cords are very old style and certainly not the HDMI cables we need.  We tried to pull through our new wires but it did not work at all so we must route the cords in front where they can be seen.  Big black cords against the white shelving are very ugly!


Our Computer:Users:petraerlandsonold:Desktop:JADE by Jenni:IMG_3935.jpg


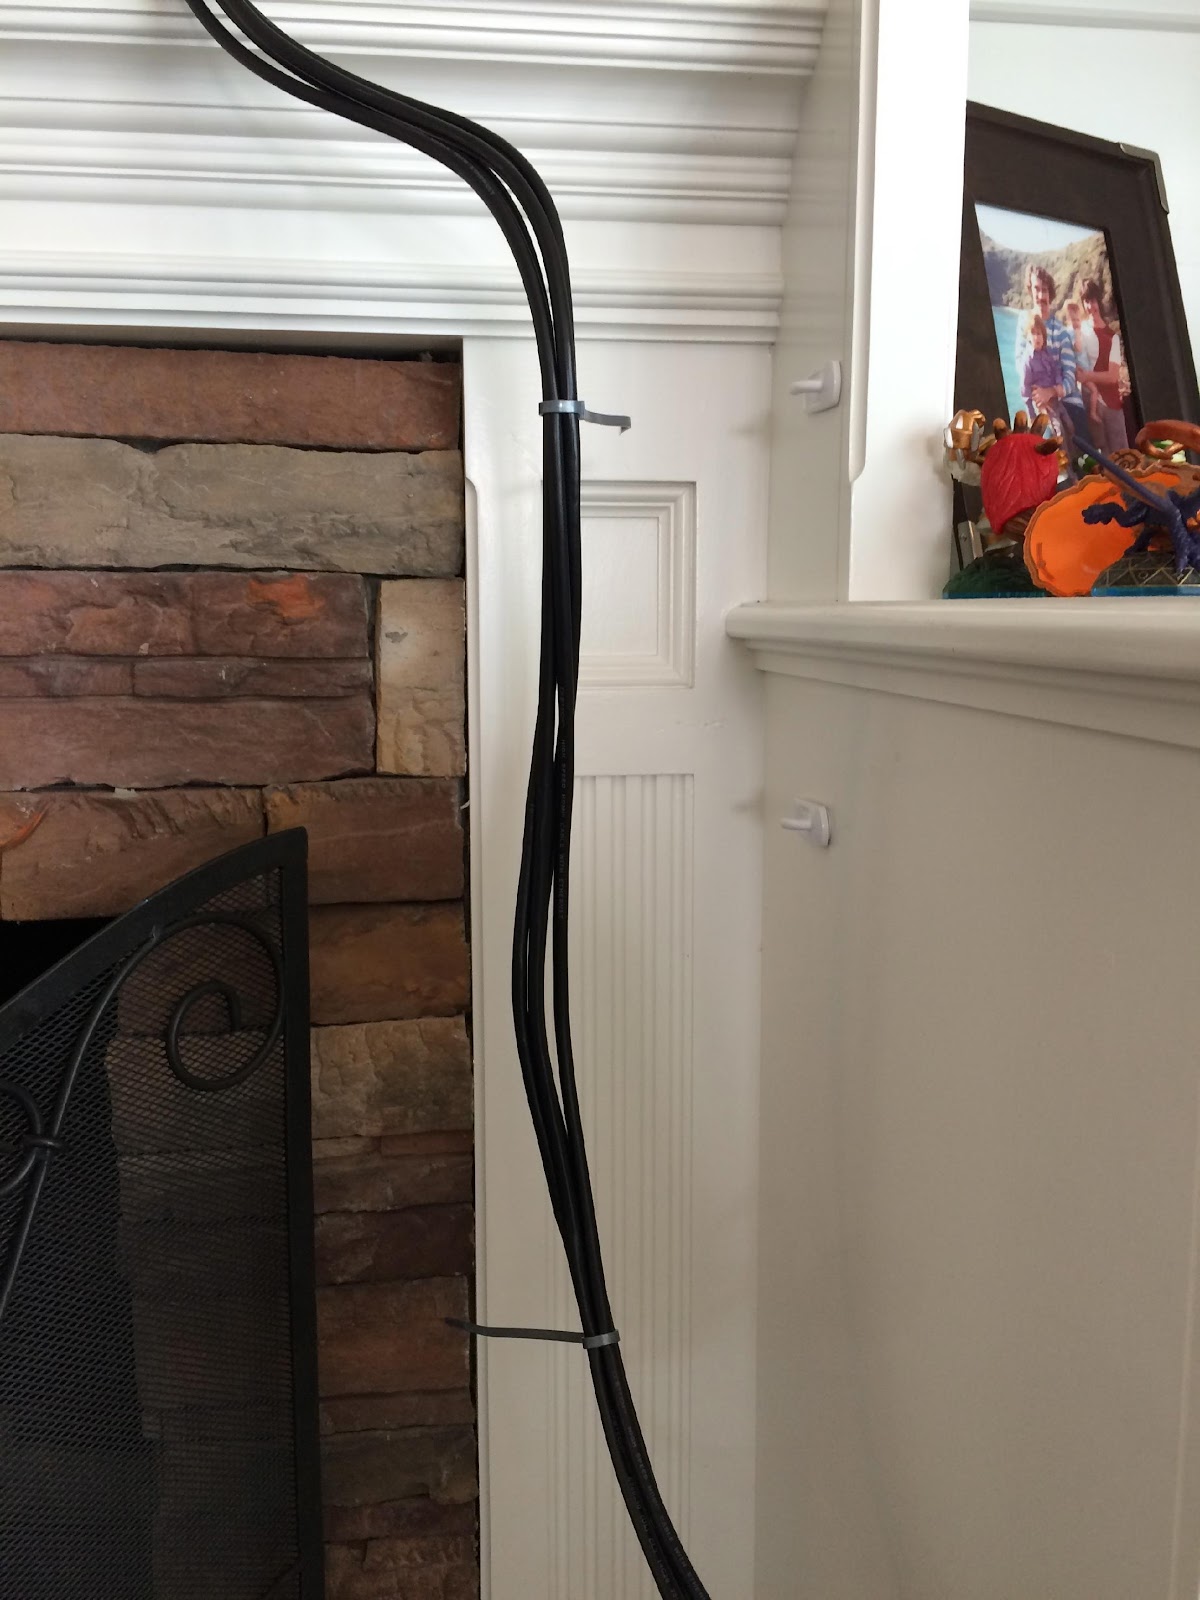
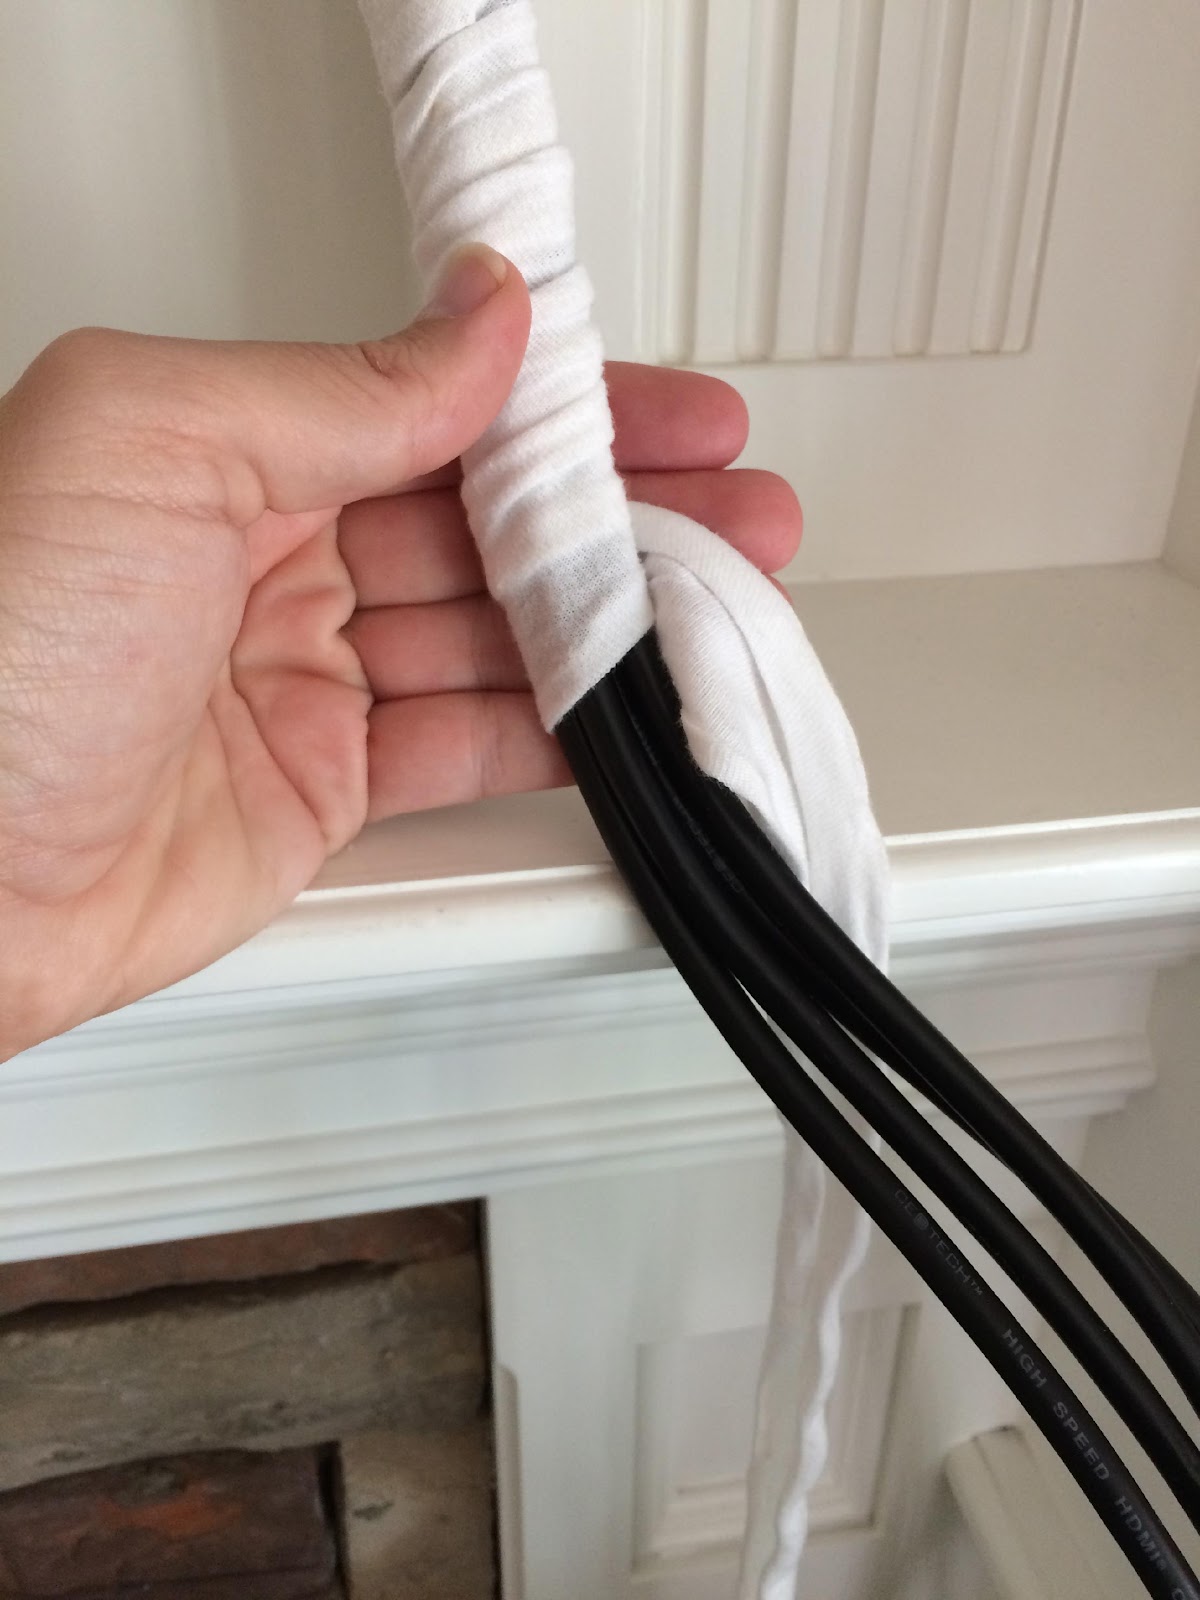
My solution is to wrap the cords in a white fabric that matches the background area.  The first step is to use some zip-ties to bind the four cords together.  If you do not have zip-ties, you could probably use twist-ties or even black electrical tape.  One tip is to bundle the wires tightly for most of the length, but then if your cords will go into a cabinet like mine you should line them up side by side to make a more flat profile where they will enter the cabinet as it will take up less space and the cabinet door will close better.


Our Computer:Users:petraerlandsonold:Desktop:JADE by Jenni:IMG_3940.jpg


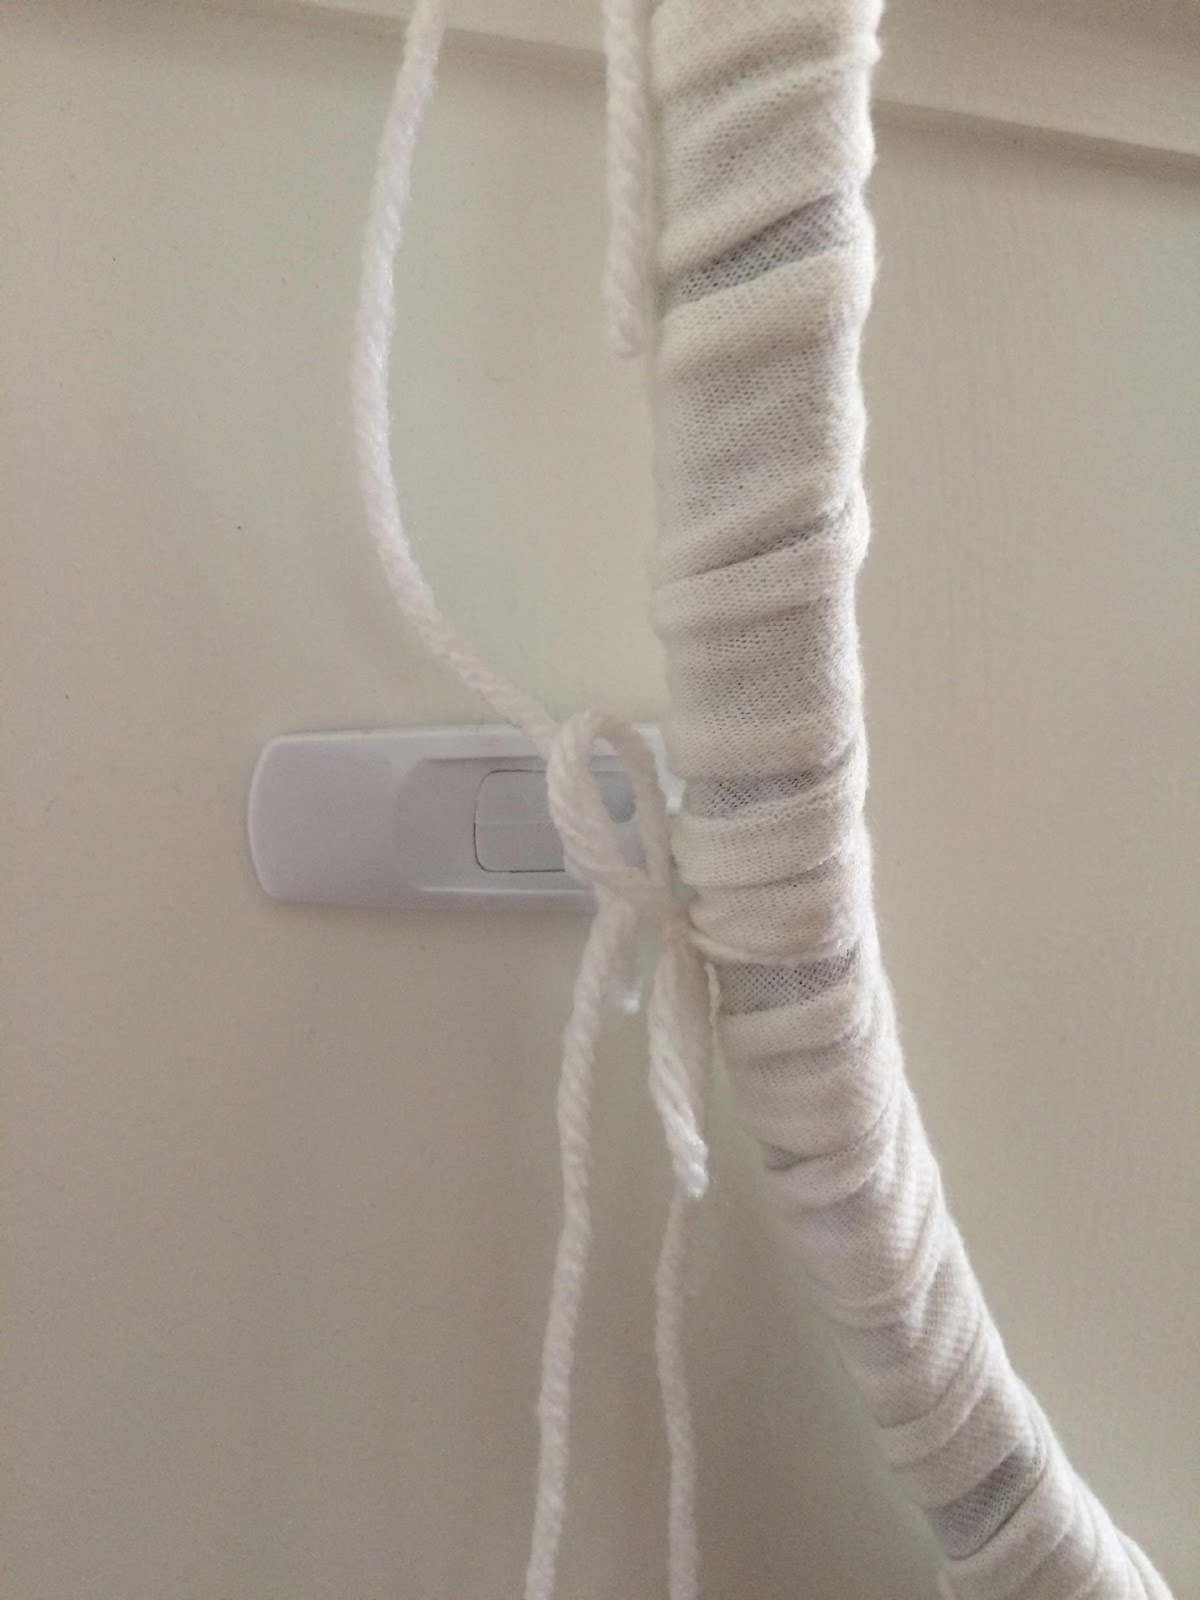
At this point in the project, I was wondering what white fabric I might have extra to wrap with…  Then I remembered I had some old cotton undershirt T-shirts from my husband that I was planning to cut up to use for rags!  Instead, I cut the shirts into long strips about 2 inches (5 cm) wide winding around and around the base of the T-shirt from bottom to top.  Using undershirts might be a little unconventional but they were clean, free and worked great so I do not argue with those facts!  I wrapped the bundle of cords with these long T-shirt strips.  Once wrapped, I used some 3M Command Strips to secure the wrapped cords to the wall with a little yarn.  Hopefully the photos do a good job of explaining this.


Our Computer:Users:petraerlandsonold:Desktop:JADE by Jenni:IMG_3947.jpg

Our Computer:Users:petraerlandsonold:Desktop:JADE by Jenni:IMG_3946.jpg

Our Computer:Users:petraerlandsonold:Desktop:JADE by Jenni:IMG_3943.jpg

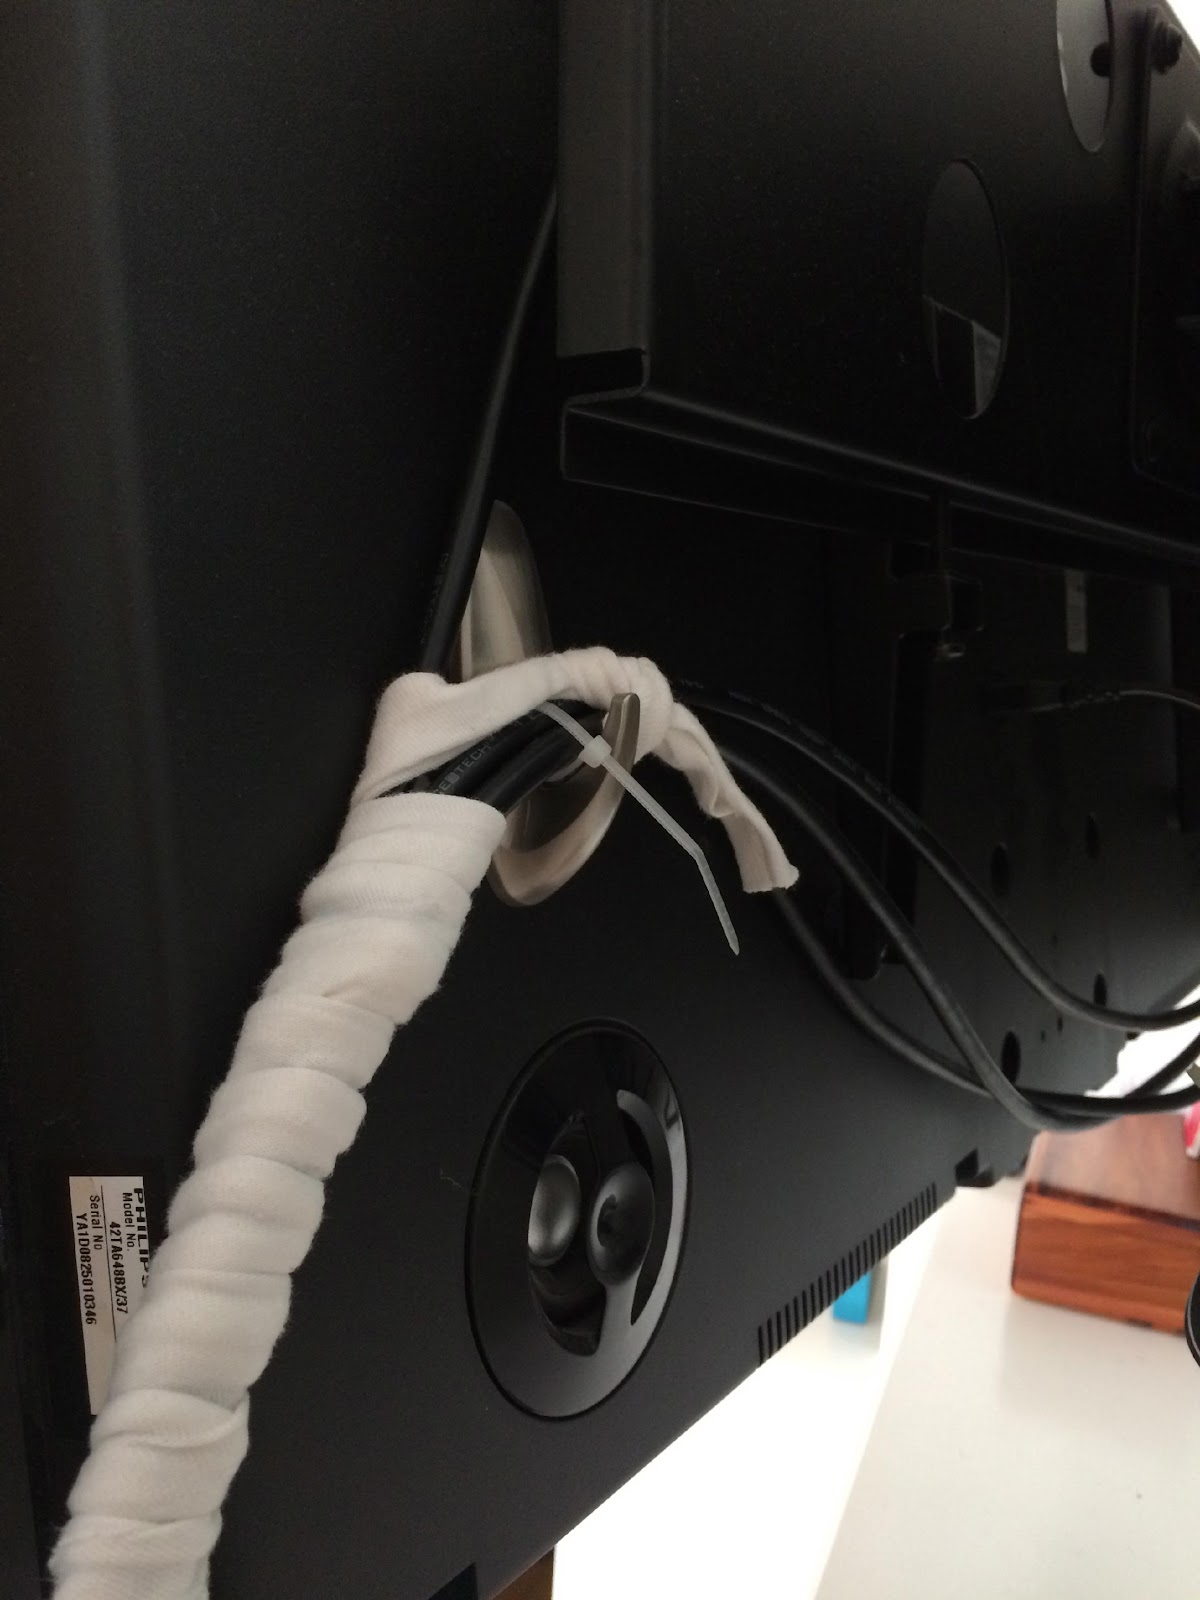
Now the cords are much better disguised!


Our Computer:Users:petraerlandsonold:Desktop:JADE by Jenni:IMG_3953.jpg


I hope you will find this idea useful and perhaps do something similar to rid your home of ugly cords! Thank you for reading!


Thanks Petra for visiting and sharing your ideas with us! What an inspirational way to hide cords! I welcome you back anytime :)


I live in Southern California with my husband and 6 year old son.  We purchased our home a year and a half ago which began my interest into home decor so that I could make our home a warm and inviting place for our family and friends.  I believe that your home should be a reflection of you and your values - a place where you are safe to be yourself.  I call my design style "Honest Charm" because I like straightforward design with clean lined furniture combined with plenty of happy pops of color.


2015/02/15

candle branches

I´m back! My surgery went surprisingly well and I´m slowly recovering. I´ve tried to take time to myself and really haven´t even been able to do much lately so I thought I´d share you one of my last years favorite DIY projects:


This is easy project and the hard part is probably finding the right branch ;). Basically you need just a drill, branch, glue and those metal parts for candles (mine are for tea light candles). I  ordered them from www.slojd-detaljer.fi, a Swedish firm, which delivers also to Finland. I´m sure you can find similar ones from Amazon or craft stores.


First you must have a branch that´s very sturdy and balanced on the table, so it won´t fall over. With candles you never can be too careful, so test the branch before proceeding to next step.

Now it´s time to decide where to drill holes for the metal candle holders. I used a pencil to mark the spots. You don´t want to drill all the way through, so the metal won´t stick out from the other side. Next you want to measure the metal spike so that you can choose the same size drill bit.


Drill the holes and put some glue in, I used just a regular wood glue to hold those metal parts tightly in place. The glue is not necessary though, but if you want to use it, choose a glue that turns clear when dry. 


Straight after the glue put your metal parts in. You need to have thick enough branch so the metal spike won´t go through the wood. It should how ever go deep enough so it´s properly adhered to the wood.


Wipe down down any exes glue as it´s still removable. Wait the glue to set and you are done!  


I made two of these, one for our kitchen table and one for the coffee table in our living room. The one in the living room I took one step further, I added some Himmeli-shapes on it, just placed them around the branch. I made sure there is enough space between the candles and the straw himmelis.


We decided to switch our coffee table to a smaller round one and the branch could´t fit on it. No worries though, we placed the one in the kitchen to our living room on a side table and the one from the coffee table to our kitchen. Why all this switching - because the one in our kitchen was a better fit to the side table :). I´m so in love with these! They look amazing with the candles! If you want to be extra careful you can use led candles, so no actual fire is needed.

I used Himmeli shapes, but you can use whatever you want to add a little extra character or just leave them as they are. It´s now your turn to make your own piece of art!

2015/02/01

Organized chaos

After visiting Ikea last weekend, I have been trying to organize our walk-in closet. It´s in our bedroom and even though it´s quite small it houses all our clothes, despite some seasonal outwear.

This is how our closet used to look like. Not that pretty, right!


We had there an Elfa system with wall mounted standards and brackets. We bought melamine board and cut the shelves ourselves We didn´t want to use the Elfa shelves, because, then we would have been limited by the width they should have been installed. We wanted those shelves to fill all the space available. The shelves on the long side of the room are only 35 cm deep, so there would be enough space to move around.On the other wall we have deeper shelves, space for dresses and an Ikea drawer system, Unfortunately I wasn´t very pleased with the drawer system. It did function well, but I just didn´t like how it looked like The fact that I always had to search my items in the lowest drawers didn´t help either ;).

This time I wanted to invest more time and money for the project. I love the Ikea´s Pax wardrobe system, but those would have cost too much and they wouldn´t have fitted that small space. I started thinking what I liked about the wardrobes - The drawers for example with their white front panels and dividers. Then browsing Pinterest I found a nice idea to use dresser in walk-in closet! So I started searching for a nice max. 45cm deep dresser. The new Nordli line was the answer.


Here is a inspiration board I came up with. I´m hoping to add a small shelf and a mirror there, too. I just have to try how I can fit them there ;). Those DVD-storage boxes from Ikea I have used to store my shoes in the upper shelf, but this time I hope to have a place for them little lower So this -not-so tall girl can reach them without a stool! In our trip to Ikea I also bought a few of those drawer dividers. I plan on using them for accessories and such.


I used to store my necklaces this way, and I hope to find a place for this in the new plan. Those lovely colorful long wooden pearls I got from my son <3. He loves to make them as gifts!

I have few in progress pictures for you! I can´t promise you when I get all done because I´m going to a back surgery. After surgery it´s going to be hard not to rush into organizing. At the same time I am going to organize our foyer wardrobe, our closet in office/craft room and a tiny nook we have in our small entry. All that only because if I remove something from our closet, I need to find a place for it somewhere else! Our home is sure going to look like a mess for a couple of days, but after the whole thing is over and done with, I hope to have a logical and practical place for everything!  


Here is the new dresser in it´s place and yes, we are going to add the rest of  the drawers, too ;) This dresser is in fact assembled of five different parts. There is a package which contains the bottom and the top. The rest is built of two drawer units. We bought two smaller units (for my stuff) and two wider units, in totally eight drawers. You can basically arrange them any way you want after deciding the width of the entire dresser. At least here in Europe there are three different base and top widths, 80cm, 120 cm and 160cm. There is even some colorful units. The structure is also very balanced, there are small "legs" underneath which you can adjust. All in all I´m pleased with the quality and finishes of this dresser!


See, all drawers in place! It was quite a job to assemble, but luckily I had a little helper with me all the time finding the right pieces and learning to read the manuals!

This is all I have for you right now, but I promise to keep you updated!

See you later again!